My favourite garden accessory this year is the dug-in slug trap. It’s simple and very effective.
Over the course of a week, I had watched as one by one slugs attacked my pepper plants, leaving only the stubble of a stalk and a few discarded leaves. I really didn’t want to use slug pellets. I had put down coffee grounds (fertilising and supposed to irritate slug bellies) and ground mace (it works for human attackers!), and would spent half an hour every night after darkness settled creeping round with a flashlight pulling slugs and snails off tender leaves. Fortunately, my neighbour Angel suggested trying this and it works!
Step 1: I used a plastic picnic cup cup as I don’t mind if it gets ruined with slime and a tin of beer. I actually like Polish beer, so this seemed like a bit of a waste until I learned the slugs like it too. I also decided to make a wee umbrella using a jam jar lid wider than the mouth of the cup and three small stakes, to keep the sun off and the rain out.
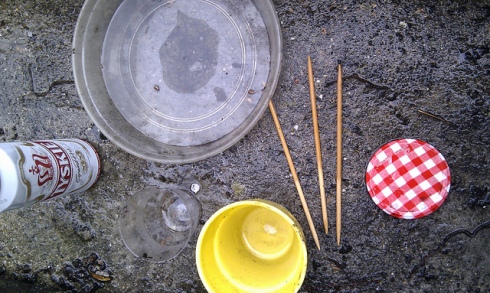
Polish tinned lager, 1 low tray, 1 plastic cup, 1 small pretty plant pot, 3 knitting needles for staking and 1 jam jar lid
As well as the dug-in trap, I laid out two traps that I could move around the garden as needed, using an old pot tray and a high, narrow plant pot. I’ve used this type of movable trap before, although I’ve always wondered whether the trek up and over the sides put them off.
Step 2: Next I dug a hole so that the rim of the cup sits just at surface level. The hole looks enormous with nothing in it, but it is probably about 3 x 2 inches.
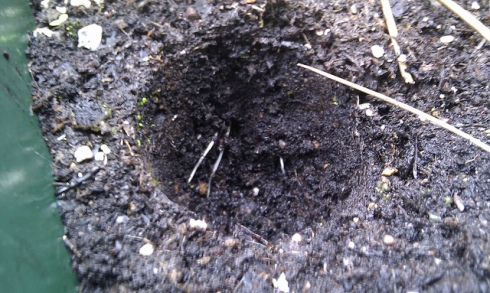
Be careful at this point, I’ve exposed some roots
Step 3: Insert the cup to ensure it fits. I think it’s better to be conservative in your estimates, as it’s a bit easier to dig out than fill in to get the correct size.
Nestle the cup as close to surface-level as possible, so the slugs just slip right in
Step 4: As I mention above, I was a bit worried about rainwater diluted my beer, so I devised a cover that won’t interfere with the trap itself. After inserting the cup, I arranged three 7-inch 5mm DPNs to form a triangle that will support the jam jar lid to act as an umbrella.
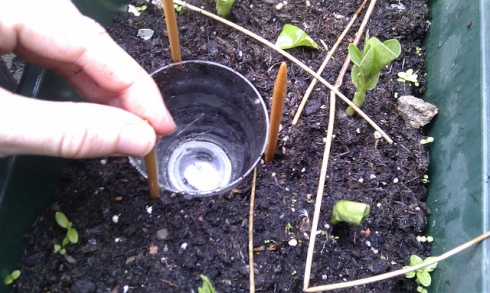
Angle them slightly inwards so that they form a buttress to hold the lid in place
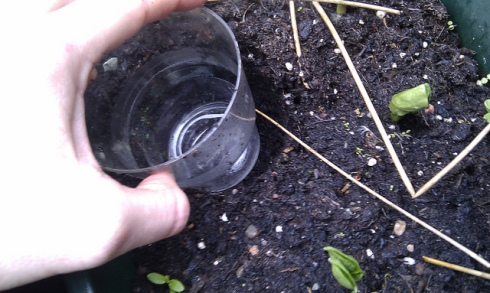
Step 5: Adding the beer is much easier if you gently remove the cup (but leave the stakes where thy are), fill the cup with beer and carefully sink back into the hole. The other option is pouring beer willy-nilly at the wrong angle so that the foam threatens to sop all over your garden. Trust me.
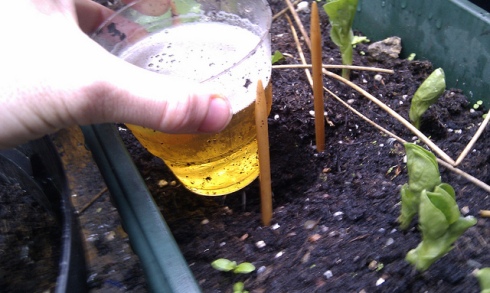
Careful with that beer! You don’t want to make the plants even tastier by sloshing it everywhere!
Step 6: Top with the jam jar lid and voila!
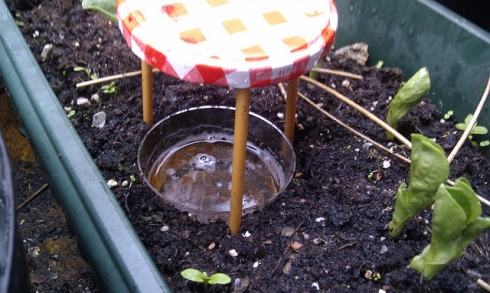
I don’t imagine slugs like watered down beer any more than I do
You do have to be a bit diligent about removing the slugs — I’ve discovered they aren’t as interested in beer when it smells of death. It’s pretty disgusting, but worth it. I’ve been replacing the beer every few days, although once summer hits properly it’ll have to be more frequent.
Even so, it works a treat! The sheltered dug-in slug trap.

A great natural solution to protecting my baby beans
If you try this technique, link to it so we can see! In the meantime, how do you protect your garden from slugs and snails?
Tags: beer traps, dug-in slug trap with shelter, garden protection, slug killer, slug traps, step by step, tutorial


Recent Comments